
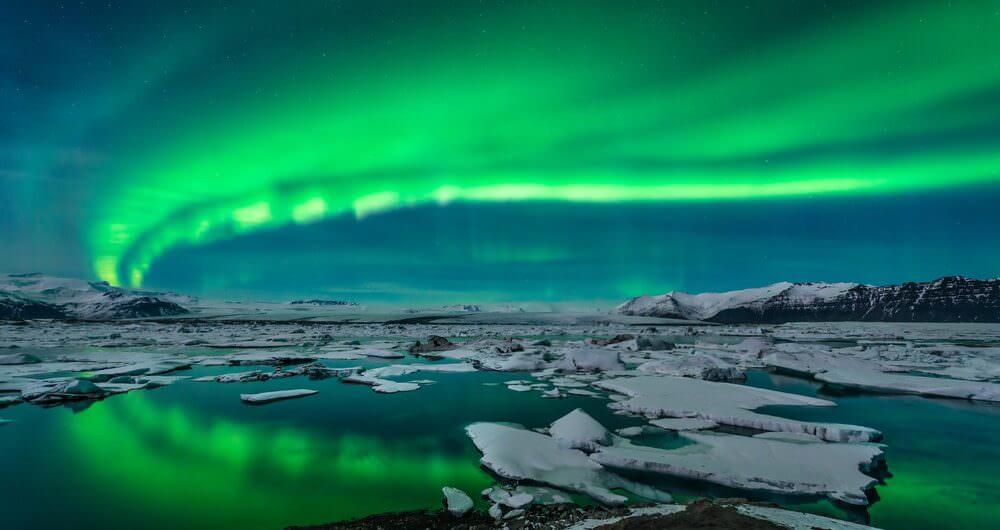
There is no more appropriate subject to photograph than the Aurora borealis to remind one that the word photography literally means to draw with light.
The Aurora of the north (Aurora Borealis) occurs when charged particles emitted from the sun penetrate the earth’s magnetic shield and collide with atoms and molecules in the atmosphere. Witnessing this phenomenon is out of this world, but the process of photographing it need not make your head spin.
The first thing I always do is set my camera ISO for the aurora between 400 and 3200 depending on how strong it is. Then I put the camera on aperture priority and take a picture. The camera picks a shutterspeed authomatically and makes an exposure. Your camera’s meter is balanced to average out light. As such if you were to point it at a black wall it would make it grey. If you point it at a white wall it would make it grey. So pointing it to a dark sky with lights will often result in an undesirable overexposed exposure. Take the picture and see what happens. Switch to manual mode and adjust the shutter speed accordingly.
Here are the steps.
1. Mount camera on on tripod, frame up your image.
Yes this can be difficult in the dark but you will take several exposures and can adjust as you go.
2. Select your base ISO setting.
I like to start with 400ISO which has very little noise but more speed than 200 or 100. Depending on your camera and on the amount of light present on the night you might go 200 or you might need 3200.
3. Select your aperture.
If you are not concerned with depth of field pick an aperture either the lowest your lens offers, or for best image quality the sweet spot on your lens. This is usually two stops down from the lowest. So if your lens is at 3.5, it would go 4.0 then 5.6. If you want to have more depth of field pick a higher number like f 8.0.
4. Put the camera on A (aperture priority) and take a test shot.
This will force the camera to pick your shutter speed for you. Note what shutter speed the camera picks when on the Aperture priority setting and how dark or light the image is.
5. Switch the camera to M (manual mode).
Double check the aperture is the same as your test shot and set the shutter speed accordingly. If your camera gave you 14 seconds but it is way too bright try halving the time. So 7 seconds. If it is just right note the shutter speed and set it to manual anyhow. This way you will have that exposure as a base reference and the meter will not jump all over the place as the aurora flares up and down.
You will need to use your judgement and experiment with trial and error. Even more so if you are not practiced at metering. You can control it yourself judging the light and what you are getting. Remember you are painting with light and your results can vary greatly depending on the settings above. Have fun and experiment. I usually bring something warm to drink and some very good mitten gloves. The aurora tends to be visible when the skies are clear and the weather is cold.