Northern Lights

Northern Lights in Iceland

Iceland, the south of the Arctic Circle, is ideal for observing the Northern Lights (Aurora Borealis). There are a few things to consider to see the glow. First of all, time and place are critical. You have to be in the right place at the right time and stay there long enough to maximize your chances.

We know how wonderful it can be when the dream of seeing the Northern Lights finally comes true, and we can only imagine your disappointment if you have to leave the country without success. No one can guarantee that you will see the lights while you are in Iceland. But for the six months from October through March, your chances will be good. If you’re out of luck and the Northern Lights don’t show up during your stay, don’t let yourself get too disappointed. Nature is not in our control, and this is completely normal. Iceland will make sure you want to come back here again in winter or summer. We wish you a successful trip and good luck hunting the Northern Lights!

The best time to see the Northern Lights in Iceland is from October to March. At this time, darkness falls early enough. December and January are the darkest months. Traveling in winter may be the best way to increase your chances of seeing the Aurora. The more time you spend in Iceland and travel, the more chances you will have.

Aurora can be highly active for several hours, but it can also disappear at any time. Sometimes it only appears for a few minutes and then disappears. Lights are most often light greenish with a tinge of white and pink.

Before setting out on your Northern Lights trip, we recommend that you check the weather and Aurora forecast on the local weather site https://en.vedur.is/weather/forecasts/aurora/. There you will see the forecast in real-time as well as for the next few days.

The site displays both the presence of cloud cover over Iceland and the strength of solar activity. Green areas on the map show where the clouds are, and white areas show clear skies. Aurora activity is defined as a numerical value. This is usually a number between two and four. A value between zero and two predicts a low chance for aurora, while the value ​​of five or more means magnetic storms, and the forecast is promising. Three and four points mean a good chance to see the lights if the sky is clear. However, these numbers can change during the day and are not always reliable for a preliminary forecast. Therefore, check the weather forecast in the last hours before your trip and keep an eye on clouds. The presence and position of clouds largely depend on the wind, so the final decision in which direction to go from Reykjavik to hunt for the Northern Lights is best taken in the last hours before the trip. Look for areas on the map that are not colored green, preferably with a clear view to the north.

Where is the best place to go to observe the Aurora?

Due to the unpredictability of the aurora, there is no specific best spot in Iceland to observe it. The lights are shown in the sky, so any cloudless and dark place can be successful. At the same time, it is better to avoid places with high mountains or buildings. Flat areas are often found close to the sea coast.

If the forecast is promising, all you have to do is find the best observation spot in the area with the least clouds. In this case, it is better to leave the illuminated areas of the city. The darker the environment, the better your eyes will distinguish colors in the sky.

You are advised to find a safe parking spot where you can get out of your car and walk safely in the dark for safety reasons. You will probably spend a few hours waiting for the Northern Lights, and then you can get very excited or distracted when it appears. Stopping on the side of the road is illegal and can be very dangerous.

If you'd rather stay in Reykjavik and find a good spot to watch the Northern Lights, there are several options for that. If Aurora's activity is strong enough, you will be able to see the lights even in the city center. However, they will be much weaker than observed from a dark place. To increase your chances, you can find some good places in the city with fewer lights:

  • Grotta Lighthouse is at the very tip of the Seltjarnarnes peninsula, 5 km (3.5 miles) from the city center.
  • Harpa Concert Hall. If you are in the city center and see lights, the waterfront area near the Harpa is the closest place without streetlights.
  • Perlan. It is a glass dome mounted on six warm water tanks. Perlan is located on the top of a hill covered with a small forest and offers a beautiful view of the capital.

You can also visit the newly built Perlan Planetarium during the daytime. Where you will have the opportunity to watch the impressive and informative show "Northern Lights." Reykjavik even has the Aurora Museum, which has a multimedia exhibition, interactive displays, and virtual reality glasses. Be sure to visit at least one of these places.

Self-drive or excursion?

If you have rented a car and are an experienced driver, you can search for the Northern Lights yourself. Driving in Iceland in winter requires experience in such driving conditions. If you are not sure of your skills or do not want to bother checking the weather forecast and finding a suitable place in an unfamiliar country, you can order the Northern Lights tour. Many tour operators in Reykjavik offer Northern Lights tours. During the tour, local guides use their knowledge and experience to maximize your chances of success.

How to dress for your trip?

Get ready for Icelandic weather. Choose the right clothes to make the time you spend waiting for Aurora comfortable. This is especially important as you will not move much while you wait for Aurora to appear. Outerwear should be heat-insulating and windproof. A hat, gloves, and a pair of warm, waterproof boots are also required. Pocket warmers are a great item to have in your hands during extended waiting periods. You can pack a thermos with hot tea or cocoa and a flashlight, so you can explore the area if you decide to walk around the car.

The earth is exposed to the solar wind, the strength of which is constantly changing. The Aurora Borealis becomes visible when the solar activity is high enough to emit lights in the Earth's magnetosphere. The aurora's visibility depends on many factors, but the very first of the necessary is high solar activity. Many websites and applications forecast solar activity several days in advance.

What Causes the Northern Lights?

According to scientists, the aurora results from collisions of electrically charged particles moving with the solar wind, with the magnetic field, and the atmosphere of the Earth. Gas molecules on the Sun's surface are highly explosive due to the incredible temperature. Due to their extremely high energy, the highly charged electrons and protons can escape the Sun's gravity. Hot plasma from time to time is released from the Sun and carried away into space at supersonic speed. This is what we call the solar wind.

When the solar wind hits our planet, it crashes into the Earth's magnetic field. Before charged particles enter our atmosphere, the magnetosphere will deflect most of them. Some particles manage to get through the magnetic field in areas where it is weaker, for example, around the magnetic poles. Then, entering the Earth's atmosphere, solar particles interact and collide with gas atoms. This interaction causes radiation, a

s a result of which we can observe a spectacular light show in the night sky.

What causes the different colors, shapes, and intensities?

Sometimes the lights are a glow without any characteristic shape. Sometimes they look like curtains, stripes, arcs, or curves following the earth's magnetic field. Sometimes they arise as a crown of rays emanating from a distant and apparent center. They can be slow-moving without changing shape or strength for ten minutes or longer. On other occasions, when the solar wind is powerful, Aurora moves fast, bends, dances, and shimmers impressively.

The Earth's magnetic field determines the shape of the auroras. When electrons enter the atmosphere and move towards the surface, they are channeled by the magnetosphere, and this causes us to see different forms of the Northern Lights.

Duration and activity

Northern Lights can be highly active for several hours, but they can also disappear at any time. Sometimes it only appears for a few minutes and then disappears. Aurora's activity depends on both solar activity and Earth's geomagnetic activity. During magnetic storms, solar fluxes can be several times faster than usual. The Earth's magnetic field is also in constant motion, sometimes much stronger than usual.

Colors

Aurora colors are most often light-greenish with tints of white and pink. The color of the lights depends on what types of molecules collide and at what height in the atmosphere.

Green is the most common color. It is caused by the high concentration of oxygen atoms at lower altitudes, 100 kilometers (60 miles) above the Earth's surface. Also, our eyes are more sensitive to green, which makes them more visible.

The rarely observed red color is caused by oxygen molecules very high in the atmosphere, about 320 kilometers (200 miles) away. The lower sensitivity of the eyes to this wavelength makes red visible only during periods of high solar activity.

Blue light appears at lower altitudes when nitrogen takes over the production of visible light and emits primarily blue wavelengths of the spectrum. Blue and purple emissions only occur during the highest levels of solar activity, making them quite rare.

Yellow and pink auroras are a mixture of red, green, or blue.

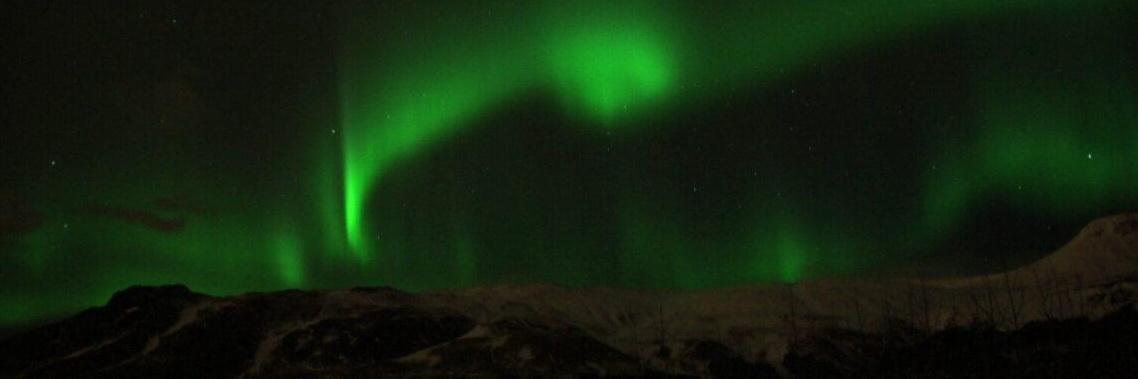
How to photograph the Northern Lights?

Photographing Aurora is not as easy as you might think. Your photo session will take place in the dark with slow shutter speed for the pictures of at least a few seconds, so in addition to the camera, you will need a tripod. It is impossible to get a perfect picture of lights while holding the camera. Low temperatures can quickly drain the batteries, and you may need spare ones for your camera. Whenever possible, use a wide-angle lens that captures most of the sky in the frame. Finally, the remote shutter release or the self-timer function on your camera for Northern Lights photography may be useful.

It would be best to have a full-frame camera that would give you minimal noise in your photos. However, you can also shoot the Northern Lights with budget cameras, getting shots you are not ashamed to put into your portfolio. The main thing is not to use the automatic mode because you will not see normal frames.

It is best to use a high-aperture zoom lens, then the issue of lack of light will hardly affect you even in the absence of snow and the moon. If there is no such lens, and all you have is the basic 18-55 / 3.5-5.6 you need to try, any DSLR camera with the proper approach will allow you to get good shots.

How to shoot the northern lights with your camera

If you have not figured out how to shoot the Northern Lights with a budget segment camera, you need to remember one rule - no autofocus. You should set up the camera even before dark, remembering the parameters on the lens and returning them to the desired position just before shooting at night. For example, consider the situation with a standard kit lens 18-55/3.5-5.6:

  • Switch camera to manual mode (M); autofocus to be remained on; set zoom to a minimum (18 mm) for maximum capture of the sky; open the lens aperture maximum (3.5).
  • Then focus on any object at 5 meters or more distance and take a photo
  • Analyze the resulting picture; if all objects in the picture will be in the focus of your camera, remember this position on the lens and set it before shooting
  • You can also partially “tweak” the focus manually if the camera cannot find it on its own.

It is better to shoot the Northern Lights with a slow shutter speed (10-20 seconds) and a minimum ISO (up to 800 if you have enough light) on inexpensive cameras. It is better to leave the camera's aperture open at full when shooting at night, regardless of whether the lens you have. This will provide an image with sufficient detail while avoiding excessive noise due to high light sensitivity.

Before photographing someone in front of the northern lights, try lighting them with a headlamp or other light source. Remember that long exposures will require them to stand completely still to avoid blurry images.

How to focus at night

One of the most difficult tasks when shooting at night is to get a photo with a sharp focus. The reason is simple; it is much more difficult for cameras to “see” in the dark. Here are some specific techniques for adjusting focus:

  • Adjust autofocus for a distant subject during the day so that the lens focuses at infinity, then set the camera to manual focus and fix the position of the focus ring.
  • Focusing on a distant light source. This method works even in the dark. If there is a moon in the sky, the choice is obvious. Focus on it, set the lens to manual focus, and you're ready to take sharp shots of other distant subjects.
  • Use your light source. When shooting at night, you may need a flashlight. If the light is bright enough, it can be directed towards a distant subject by focusing on it. However, if the flashlight does not sufficiently illuminate the area, place it on the ground in the frame, pointing it at the ground or a rock.
  • Use manual focus. If all attempts to use autofocus are in vain, or you want to make fine adjustments to focus, do it manually. Turn off the autofocus function and turn the focus ring on the lens. A good way is to use Live View and zoom to the focal point on the LCD screen.

How to shoot the northern lights on your phone?

Don't have a modern photo camera? You can try to shoot the Northern Lights on a smartphone with a good camera. Of course, there is no guarantee that you will get the same shots; smartphones are inferior in quality and detail to professional cameras.

You will also need an application that allows you to adjust the shooting parameters manually: remove autofocus, set a suitable ISO and shutter speed, open the aperture. The parameters will depend on the matrix used in the smartphone. It would be best if you also had a tripod to avoid shaking and unnecessary movement.

How to film the northern lights on video?

Taking a photo differs little from recording a video. Still, there is one small exception - you will need a large capacity battery or at least a fully charged one since it will not be possible to replace a battery during recording.

While shooting, it is also recommended not to use the viewfinder but to work with live-view mode, as your breath can fog up the lenses.

And one last tip for video lovers. If you have enough batteries, hot tea, and patience, try the time-lapse technique. A time-lapse is many frames taken at regular intervals and edited into a movie. Very often, this type of shooting is used to show the movement of the Northern Lights.

Don't be afraid of the dark.

There is nothing wrong with taking pictures after sunset. Night photography has its unique challenges, and it's a great way to learn to understand exposure settings better. Focusing at night is also challenging; however, you'll quickly learn to take sharp photos with a little effort and practice.